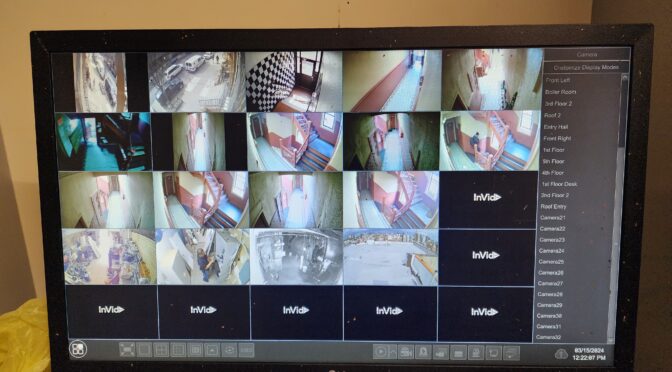
NYC Security Camera Maintenance Guide
Your cameras are showing a clear live picture, so the system must be recording—right? Not necessarily. A security camera can display live video while its DVR or NVR fails to save usable footage. The safest time to discover a recording problem is during a routine check, not after a package theft, break-in, building incident or property-damage claim.
Quick answer: How can you tell if a DVR is recording?
Choose a camera, note the current time, create a small test event in view of that camera and wait a few minutes. Then open playback, select the same camera and time, and confirm that the event can be found and played from the recorder. Repeat the test on several channels. Also check the recording timeline, hard-drive status, system clock, recording schedule and overwrite settings.
A live view alone is not proof of recording. Live video confirms that a signal is reaching a screen or app at that moment. It does not confirm that the recorder is writing video to its hard drive, retaining it for the expected number of days or allowing it to be retrieved.
1. Review the recording timeline
Open the DVR or NVR playback screen and select yesterday’s date. Most recorders show recorded footage as colored bars or event marks along a 24-hour timeline. Continuous recording may appear as one unbroken band, while motion or event recording may appear as shorter segments.
Look for unexplained gaps, channels with no timeline activity and recording that stops at the same time each day. A missing segment may point to a schedule error, camera interruption, storage problem or recorder fault. Do not assume that every color means the same thing across brands; use the recorder’s legend or manual to identify continuous, motion, alarm and event recordings.
2. Perform a real security-camera playback test
A populated timeline is helpful, but the stronger test is retrieving and playing the video. Choose a recent time when you know someone walked through the camera’s view. Play the footage, pause it, move forward and backward, and confirm that the image remains usable.
Test more than one camera. Each channel can have its own recording schedule, connection or configuration. A 16-camera system, for example, may record 15 channels while one important entrance camera silently fails.
Use this simple test
- Stand within view of the selected camera and note the exact time.
- Walk across the scene for 10 to 15 seconds.
- Wait a few minutes so the recorder can index the clip.
- Open local playback on the DVR or NVR.
- Select the correct date, camera and time.
- Confirm that the entire event plays without an error, frozen image or missing segment.
If the system uses motion recording, test during both daylight and nighttime conditions. Poor motion sensitivity, an incorrect detection area or weak nighttime image quality can cause important activity to go unrecorded even when daytime tests succeed.
3. Check DVR/NVR storage and hard-drive warnings
Open the storage, disk management or HDD menu. The installed drive should normally appear as active, healthy or normal, with its expected capacity available to the recorder. Warning language varies, but common problem indicators include:
- HDD not detected, no disk or uninitialized disk
- Disk error, abnormal status or bad sectors
- Read/write failure or recording exception
- Zero available capacity or an unexpectedly small drive
- Repeated beeping, restart cycles or storage alerts
Do not format or initialize a drive if footage may be needed. Those actions can erase recordings. If the DVR is not recording and the drive contains potentially important evidence, stop changing settings and have the system evaluated.
4. Verify the system date, time and time zone
Compare the recorder’s displayed time with a phone or another accurate clock. Confirm the date, year, time zone and daylight-saving-time setting. A camera system may be recording correctly while placing clips under the wrong hour or date, making footage difficult to find when it matters.
For a New York City property, the recorder should use the correct Eastern Time configuration. After any time correction, run another test and document the change. Large clock adjustments can affect how older clips are located and interpreted.
5. Confirm overwrite and video-retention settings
Many DVRs and NVRs can overwrite the oldest footage automatically when storage becomes full. If overwrite is disabled, some systems stop recording after the hard drive reaches capacity. Confirm the intended setting and then check the oldest available recording to estimate actual retention.
Retention time depends on camera count, resolution, frame rate, compression, recording mode, activity level and drive capacity. Changing any of these can shorten or extend how many days of video remain available. Never promise a fixed retention period without testing the actual system.
6. Check the recording schedule for every camera
Review whether each channel is configured for continuous, motion-based, event-based or scheduled recording. Confirm that the schedule covers the correct days and hours. Pay close attention to overnight periods, weekends and holidays—times when stores, offices and building common areas may be most vulnerable.
If motion recording is enabled, verify the detection area and sensitivity for each camera. A schedule may look correct while motion detection itself is disabled or excludes the part of the image where activity occurs.
Does remote viewing prove the recorder is saving video?
No. Seeing live cameras on a phone confirms remote access to a current video stream; it does not prove that footage is being stored. Test playback directly at the recorder and through the mobile app if both methods are important to you. Local playback that works while remote playback fails may indicate an app, account, network or connection problem rather than lost recordings.
Why routine DVR recording checks matter
Apartment buildings, brownstones, co-ops, condominiums, mixed-use properties, stores, warehouses and offices rely on recorded video to review events after they happen. A quick monthly playback check can expose a failed hard drive, lost camera channel, incorrect clock, disabled schedule or shortened retention period before footage is requested.
Also test the system after a power outage, internet or router change, recorder update, camera replacement, construction project or unexplained beeping alert. Property managers should keep a simple log showing the test date, cameras checked, oldest available footage and any warning displayed.
Real Brooklyn repair example: live cameras worked, but the Hikvision DVR was not recording
At a Park Slope apartment building, a 16-camera analog surveillance system still displayed live video, but the Hikvision DVR had stopped recording and playback produced no usable footage. Troubleshooting followed the complete recording path instead of assuming the cameras had failed: camera feeds → recorder channels → storage status → hard drive → recording settings → playback → network and remote viewing.
The recorder reported a storage or hard-drive fault. The failed drive was replaced with a 2 TB surveillance hard drive, the Hikvision DVR was reconfigured, and the existing 16 camera channels were tested again. Recording was restored, playback was verified, and remote viewing was confirmed after the recorder and storage settings were checked.
Why this matters: a clear live picture proves only that video is reaching the recorder or display at that moment. It does not prove that footage is being written to storage. A failed hard drive, disabled schedule or recorder fault can leave a property with live video but no evidence to retrieve later.
When to call for DVR or NVR troubleshooting
Arrange professional troubleshooting when playback shows no footage, the timeline has unexplained gaps, a hard drive is missing or abnormal, the recorder repeatedly beeps, one or more channels stop recording, remote playback disappears or the system will not retain the expected history.
Unlimited Applications Security Company troubleshoots security camera recording, playback, DVR/NVR storage, hard-drive errors, video loss and remote viewing for properties throughout Brooklyn, Queens, Manhattan, the Bronx and Staten Island. Service areas include Park Slope, Williamsburg, Bushwick, Bay Ridge, Flatbush, Downtown Brooklyn, Astoria, Long Island City, Forest Hills, Flushing and Jamaica.
Camera has a picture—but you are not sure it is recording? Call (347) 433-6873 and describe whether the problem affects one camera, several cameras, playback or the entire recorder.
Brooklyn security camera repair Queens security camera repair Request a site visit
DVR recording FAQs
Why does my DVR show live video but no playback?
The cameras can still send live video when the recorder is not saving it. Possible causes include a failed or undetected hard drive, a disabled recording schedule, incorrect motion settings, full storage with overwrite disabled or a recorder fault.
How often should I check whether my security cameras are recording?
A practical baseline is once a month and after any outage, equipment change or warning. Higher-risk properties may need more frequent checks based on their security plan and operational requirements.
How do I know how many days my DVR retains?
Use playback to locate the oldest available footage and compare that date with today. Actual retention changes with camera count, resolution, frame rate, compression, recording mode, activity and hard-drive capacity.
Should overwrite be turned on?
Overwrite is commonly enabled so a full drive replaces the oldest video and continues recording. The correct choice depends on the property’s evidence-retention policy. Confirm the setting, understand its effect and export important footage promptly.
Can I fix a DVR hard-drive warning myself?
First record the exact warning and avoid formatting the drive if footage may be needed. Power, cabling, drive or recorder faults can produce storage errors. Professional troubleshooting is appropriate when evidence is at risk or the cause is unclear.